

HOW TO MAKE A CUTTING TEMPLATE
There are a few rules you have to follow so we can feed our laser cutter with the correct information. This page gives you clear instructions for the production of a cutting template with the highest success rate.
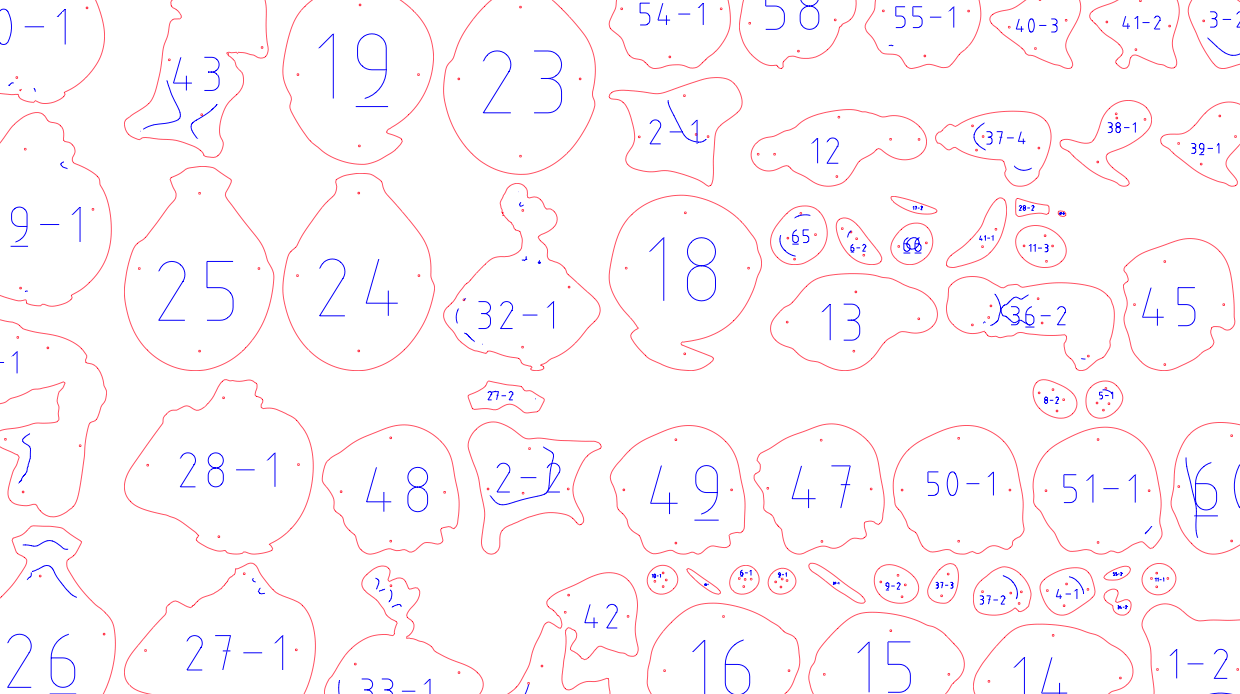
1.Cutting and/or engraving?
Cutting lines (through-and-through) are marked with a red line (Red 255, Green 0, Blue 0) with a 0.1pt thickness or use “hairline thickness”.
Engraving is activated by marking all the elements to be engraved in black (Red 255, Green 255, Blue 255).
2. Full-scale design
We work with full-scale sizing in millimetres. This means that the size of your design cannot exceed 980mm x 580mm. The material you want to us to process can be larger in size with a maximum width of one metre (1,000mm).
Suppose you want to incorporate your design into a door. We can simply insert this door into our machine, even if it is three metres tall.
3. Draw a cutting line for the outside as well
Obviously, the outside edges of an object also have to be cut with the laser cutter. So don’t forget to insert a cutting line to mark the outside of your project!
4. Use all of your material
If you want us to cut out several objects or parts, arrange the images in the smartest possible way so no materials are wasted.
5. Fonts
Convert all fonts into contours to prevent clashing fonts.
Ready to roll?
Have you completed your design? Use the tips above to check all the details, then export your design as a .pdf, .eps or .dxf file. Of course, you can email it to us if you prefer.